Setting up a Linux Workstation for Software Development
- Why Keyboard Shortcuts don't work on non-US Layouts and how Devs could fix it
- An Interactive Virtual Keyboard to Visualize any Collection of Shortcuts
- An app to show the shortcuts of the current application for Windows, Linux, and macOS
- Automatically add <kbd>-tags with a Single Regex
Introduction
In my opinion, Linux is the best operating system for a software engineer, except they develop explicitly for Windows or macOS. Whenever I read about new features for the Windows Subsystem for Linux, I wonder why people settle for anything less than the real thing. Linux aids many of my workflows with its customizability, superior command-line experience, native support for containerization platforms, a dependable package management system, and many other features that I will describe in this blog post. macOS comes close, but, in my opinion, falls short due to exorbitant hardware costs and less room for customization.
Still, as with any other operating system, optimizing a Linux workstation for software development requires some configuration. In this post, I will present tools and concepts that I think are very helpful, but overlooked by many. I will try to show only things that are not specific to my workflows, but rather useful for almost any software engineer, DevOps specialist, or just regular productivity enthusiast. Naturally, many of the configuration options and tools covered in this post are subjective. Nevertheless, I am confident that my suggestions are a good place to start. They have served me well over the years and I continually try to optimize my setup. Hence, I very much appreciate any improvement you might suggest.
Prerequisites
A Linux machine
For this guide, I will use Ubuntu 20.04, which is the current LTS release. I am very happy with Ubuntu. Anything I don’t like can easily be changed. The biggest advantage over many other distributions is probably that the Ubuntu community is very large and it is usually easy to find people with similar problems. There is also a very active StackExchange community. However, most of the things covered in this post will apply to pretty much any Linux distribution and even macOS.
Some command-line experience
Much of this post is intended for people who feel right at home when they see a ~- character. If you are not comfortable working with command-lines and have no intention to change this, you can still read the other sections though.
Tweaking Ubuntu
Before we start any serious work, I will point out some changes to Ubuntu itself that I apply on all my machines.
Appearance
One of the first things I do after installing Ubuntu is to install the GNOME Tweak Tool:
sudo apt-get install gnome-tweak-tool
It enables complex modifications of the GNOME desktop environment. I recommend you play around with some of its options. For this guide, we will only consider the Appearance section. Specifically, we want to change the default Ubuntu theme to another one that provides better contrasts and an overall cleaner experience, namely the Adapta-gtk-theme, which is based on the Material Design guidelines.
sudo apt-get install adapta-gtk-theme
After installing the theme, you should restart the GNOME Tweak Tool, and you can then select Adapta-Eta as your new theme. The theme comes with some nice benefits that you wouldn’t think of at first. For example, it fixes the ridiculously small toolbar icons in the Eclipse IDE.
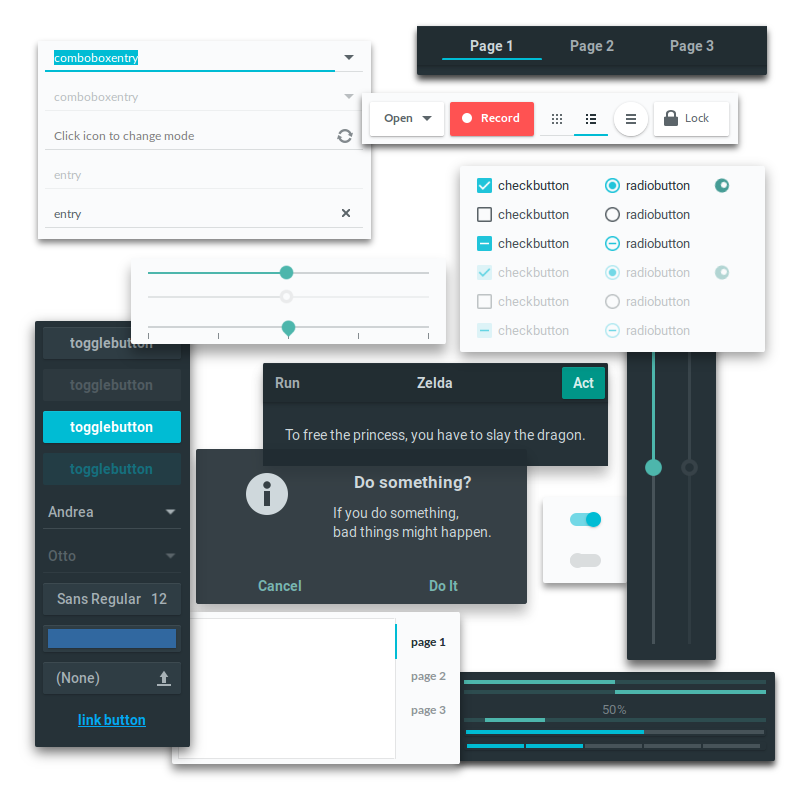
Adapta Theme elements (Source).
Unfortunately, the Adapta theme is no longer actively maintained. It is still a perfectly fine theme to use and if you notice any glitches, you can always switch themes with a couple clicks. A possible alternative is Materia, which also works well with the remainder of this blog post.
Nautilus Type-Ahead Search
The next thing I suggest is to change the Nautilus search behavior. With recent Ubuntu distributions, there is no type-ahead search in the standard file explorer. This means you can not start to type some letters and jump between files that start with these letters. Instead, Nautilus will enter a dedicated search mode that is confusing and quite slow for folders with a large number of files.
Fortunately, we can easily get the old behavior back:
sudo add-apt-repository ppa:lubomir-brindza/nautilus-typeahead
sudo apt dist-upgrade
killall nautilus # to force a restart
Searching through my /bin folder by typing ahead (Source).
There is a StackExchange answer that provides further details.
Hibernation
Another thing that is essential for me is hibernation. Usually, I will only shutdown my computer once a week or even less. However, I am not a big fan of suspending for long periods of time. Power outages could have unforeseen consequences and I simply feel a little better if my machines are off the grid altogether.
Unfortunately, setting up hibernation is tricky and can depend on your hardware. I updated this section multiple times already to contain the most robust solution, but you never quite know. If you don’t care about hibernation, you should probably skip this section and spare yourself the trouble.
In principle, hibernation is possible out of the box. Just type sudo systemctl hibernate. However, this is likely to fail with an error. My fix for this relies on a mixture of this and that blog post. First, we need to find out the current size of our swap file:
The below instructions assume that you use Ubuntu 20.04 with a swap file. This is the default for new installations. However, if you upgraded from a previous version, you might still have a swap partition. In this case, the process is similar, but not covered here.
sudo swapon --show # or `cat /proc/swaps`
If this is less than your main memory (RAM), you will need to increase it:
sudo swapoff -a
sudo fallocate -l <SIZE>G /swapfile
sudo chmod 600 /swapfile
sudo mkswap /swapfile
sudo swapon /swapfile
sudo swapon --show # to verify changed size
Next, we need to find out the UUID and offset of our now large enough swapfile:
sudo swap-offset /swapfile
> <OFFSET>
sudo findmnt -no SOURCE,UUID -T /swapfile
> <UUID>
With this, we are almost done. Using the UUID and the file offset, we edit the following line in /etc/default/grub:
`GRUB_CMDLINE_LINUX_DEFAULT="quiet splash resume=UUID=<UUID> resume_offset=<OFFSET>"`
Then, we create a conf.d resume file. Simply do sudo nano /etc/initramfs-tools/conf.d/resume and add the content RESUME=UUID=<UUID> to the file. At last, we need to update grup and initramfs:
sudo update-grub
sudo update-initramfs -u -k all
And finally, you should be able to do sudo systemctl hibernate.
Please let me know if this approach doesn’t work on your system. I would like to include potential problems in this post, if there are any.
Boosting Command-Line Productivity
I believe that command-line proficiency can significantly boost developer productivity. This is especially true in times of DevOps and NoOps, where developers are supposed to handle deployment pipelines and cloud infrastructure. Fortunately, there are some tools that can help you become a command-line wizard.
Shortcuts
Before going forward, I would suggest to set up some general terminal shortcuts. Simply go to Edit -> Preferences -> Shortcuts. I like to replicate web browser shortcuts for opening new tabs and windows, closing tabs, and cycling between tabs.
Did you know that all common terminal emulators have an Undo shortcuts with Ctrl+Shift+-? Among many other things, my side-project KeyCombiner has a public collection of terminal shortcuts, many of which are barely known and still very useful.
However, using this interface, it is not possible to set up Ctrl+Tab and Ctrl+Shift+Tab as tab switching shortcuts. Gnome has some issues with using the Tab key in shortcut configurations. Thanks to this answer from the Ubuntu community, we can get around this. Simply execute the following in your terminal:
gsettings set org.gnome.Terminal.Legacy.Keybindings:/org/gnome/terminal/legacy/keybindings/ next-tab '<Primary>Tab'
gsettings set org.gnome.Terminal.Legacy.Keybindings:/org/gnome/terminal/legacy/keybindings/ prev-tab '<Primary><Shift>Tab'
Switching from Bash to Zsh
A couple of months ago, I made an important change in my life. I switched from Bash to Zsh.
There are a lot of blog posts, threads, and articles that compare Bash and Zsh, e.g.:
- What is ZSH, and Why Should You Use It Instead of Bash?
- Zsh vs Bash
- Oh-My-Zsh! A Work of CLI Magic — Tutorial for Ubuntu
At the end it boils down to one thing: Plugin and theme support
Zsh has an amazing themes and plugins ecosystem. Theme support allows you to easily get a beautiful shell. Plugins range from simple auto-completion for all kinds of applications and tools(git, mvn, hugo, …) to complex stuff like improved search capabilities. Because of this fact alone, Zsh is superior to Bash.
However, chances are that you grew fond of Bash and that you get a bad feeling when somebody tells you that there is something better. I understand, it was the same for me. Still, I urge you to give it a shot. The transition is very painless since pretty much everything you like about Bash still works with Zsh. You will not have to learn new commands.
Installing Zsh
Installing Zsh on Ubuntu is very easy. We can use the regular package manager:
sudo apt install zsh
Then, we set Zsh as our new default shell:
chsh -s $(which zsh)
The chsh command updates the /etc/passwd file, but does not affect the current session. You need to log out and log in again to have zsh as your default shell.
Configuring Zsh History
For me there are few things worse than searching for an old shell command only to find out that the shell’s history size was set to a ridiculously low default number and that, because of this, the command was not saved.
Therefore, we extend the Zsh history size by putting this at the end of the ~/.zshrc configuration file:
HISTSIZE=10000000
SAVEHIST=10000000
For me, the command history is a tool to search for previous commands I might need now. I do not use it as a protocol for what I did when and in which exact order. Therefore, I use the following options to get rid of all duplicates in my history automatically:
## History command configuration

setopt HIST_IGNORE_ALL_DUPS # ignore duplicated commands history list
Also, I like to use multiple terminal sessions in parallel, potentially working on the same problem. For this, it helps a lot to share the same history among all sessions. It can be accomplished by
setopt SHARE_HISTORY # share command history data
If you are transitioning from Bash to Zsh, you probably want to keep your existing Bash history. In contrast to Bash, Zsh stores timestamps in its history file. Therefore, re-using the Bash history file does not work out of the box. Fortunately, all we need to do is to append some timestamp to all the commands from our previous Bash history and put them into the new Zsh history file. You could easily script this yourself or use one of the many good scripts that other people wrote, such as this one.
Zsh Features that are not in Bash
Once we have Zsh installed and finished our basic history configuration, we can start to take a look at some out-of-the-box features that make it stand out in comparison with Bash. If these do not impress you, keep in mind that the real big thing is plugin support, which I cover below.
Recursive Path Expansion
Zsh can do much more sophisticated expansions than Bash. This is documented in detail in the Zsh manual.
One feature that you can easily start to use is recursive path expansion. If you type cd /usr/local/b in Bash, you can then press Tab to expand this to cd /usr/local/bin. With Zsh, you can also type cd /u/lo/b and then press Tab. Zsh will recursively expand all path elements:
The above animation shows also that you can omit cd when changing directories.
Calculator: zcalc
Before switching to Zsh, I was often using the Python Shell as a calculator. However, this has a few downsides. Obviously, the Python Shell is not primarily developed to be a good calculator app. For example, simple operations, such as sqrt, require import statements, and there are no convenient ways to access results of previous lines.
The calculator script shipped with Zsh is a very simple and efficient solution. Before using it, it has to be loaded:
autoload -Uz zcalc
If you plan to use it often, you can add the autoload command to your ~/.zshrc.
Then, start the calculator with zcalc and do some calculations:

Results of previous operations can be accessed with the $-character.
Advanced Aliasing
Zsh has some unique aliasing capabilities.
Suffix Aliases
This means you can assign applications to file suffixes, e.g. alias -s txt=vscode will allow you to open a .txt file with Visual Studio Code by just typing file.txt.
Global Aliases
Global aliases are set with the -g flag and allow to specify a replacement for any part of a command. For example, if you set alias -g G=' | grep' you will be able to do the following:
To make aliases permanent, it is required to add them to your ~/.zshrc.
Installing ZSH plugins
Finally, it is time to explore the real strength of Zsh, which means installing plugins to boost our productivity above anything this anime character has ever seen before:

Package Manager: Oh my Zsh
A good place to start is to install Oh my Zsh, “a community-driven framework for managing your Zsh configuration.” Simply do:
wget https://github.com/robbyrussell/oh-my-zsh/raw/master/tools/install.sh -O - | zsh
Copy the template configuration file .zshrc.zsh-template in the .zshrc home directory and apply the configuration by executing the source command. Both can be done at once by executing the following line:
cp ~/.oh-my-zsh/templates/zshrc.zsh-template ~/.zshrc
Oh my Zsh comes with many themes and plugins that we only have to enable in the configuration file in order to use them. In the next section, we will start by selecting a pretty theme.
Theme: Agnoster
Personally, I like the agnoster theme. It works well with the Adapta-Eta Gnome theme we have set previously.
To enable a theme, set ZSH_THEME to the name of the theme in your ~/.zshrc, in my case this is ZSH_THEME=agnoster. If you have troubles with special characters not being shown properly, install the Powerline font package:
sudo apt-get install fonts-powerline
The Oh my Zsh GitHub wiki provides a well curated list of available themes along with screenshots.
All pictures and animations of terminals you see in this post show the Agnoster theme with slight modifications to the prompt. In particular, I removed the git-part of the prompt and added a newline part instead. If you would like to replicate this, edit your ~/.oh-my-zsh/themes/agnoster.zsh-theme and replace the ## Main prompt part close to the end with the following:
|
|
Additionally, I recommend changing the font color of the directory part of the prompt from black to white. In my opinion, this provides better contrast with the dark blue background:
# Dir: current working directory
prompt_dir() {
  prompt_segment blue white '%~'
}
Basic Plugins
Next, you should enable some included plugins via adding them to your plugins setting in your ~/.zshrc file. After this step, it might look like this:
plugins=(colored-man-pages git python django mvn aws docker vscode)
You can browse all the plugins that come with Oh my Zsh in the official GitHub repository.
The above listed plugins are rather trivial, they provide command completion and define a set of aliases and shortcuts that come in handy when working with the respective tool. Nevertheless, this provides a real productivity boost. For example, finding out which git commands start with r becomes much simpler:
Jump to Frequently Used Directories
Most command-line work happens in just a handful of directories. For me, these are primarily the root folders of various software development projects. Of course, I could manually set aliases for these folders so that I can quickly switch between them, but this would be tedious.
Fortunately, there is a better solution with z. It tracks your most used directories and will take you to them via z <query>. The query can be any part of target directory’s path:
The software is already bundled with Oh my Zsh, simply add z to the list of plugins:
plugins=(z colored-man-pages git python django mvn aws docker vscode)
I could have probably included this one in the list of basic plugins above, but I wanted to highlight it because I find it particularly useful.
Supercharging History Search
The original Bash history search always bothered me. Repeatedly pressing Ctrl+r and hoping to get lucky at some point is very cumbersome if you have lots of similar commands containing the query. To be fair, there are also great additions for Bash that improve this situation, such as McFly.
However, this is about improving history search with Zsh. I believe the best solution is using peco-history. It is a Zsh plugin that relies on peco to interactively filter through your history file. Peco is a general-purpose interactive filtering tool that you can (and should!) also use as a stand-alone tool in your terminal. On Ubuntu, we can install it from the official repositories:
sudo apt-get install peco
Afterwards clone zsh-peco-history into the $ZSH_CUSTOM/plugins directory. Zsh will automatically resolve the pre-set shell variable:
git clone https://github.com/jimeh/zsh-peco-history.git $ZSH_CUSTOM/plugins/zsh-peco-history
Then, add zsh-peco-history to the list of plugins:
plugins=(zsh-peco-history z colored-man-pages git python django mvn aws docker vscode)
The plugin will be ready once you start a new terminal session.
The following animation shows that this improved history search was very helpful for writing this blog post. It allowed me to easily search for the exact commands I used when I set up my current machine:
Searching shell history with peco.
Autosuggestions
Our new history search is great. The bad news is that we will not use it very often, because there is something that is even better in most cases: zsh-autosuggestions
This plugin suggests completions for your commands as you type. By default, the suggested completion will be the first match in your history. This is how it looks like:
Using a suggested git command-line.
git clone https://github.com/zsh-users/zsh-autosuggestions ${ZSH_CUSTOM:-~/.oh-my-zsh/custom}/plugins/zsh-autosuggestions
Afterward, add zsh-autosuggestions to your plugins setting in your ~/.zshrc file:
plugins=(zsh-autosuggestions zsh-peco-history z colored-man-pages git python django mvn aws docker vscode)
Syntax Highlighting
Another great plugin is zsh-syntax-highlighting. It highlights commands while you are typing them. This is especially useful for catching syntax errors. Once again, install via git:
git clone https://github.com/zsh-users/zsh-syntax-highlighting.git ${ZSH_CUSTOM:-~/.oh-my-zsh/custom}/plugins/zsh-syntax-highlighting
Then, add zsh-syntax-highlighting to your plugins setting in your ~/.zshrc file:
plugins=(zsh-syntax-highlighting zsh-autosuggestions zsh-peco-history z colored-man-pages git python django mvn aws docker vscode)
Syntax highlighting also indicates whether a command is typed correctly.
Clipboard Tool
This one is not really a full-blown plugin. Oh my Zsh comes with a script called clipcopy out of the box. It is a simple tool that enables clipboard copy and past operations from the command-line:
<command> | clipcopy    # copies stdin to clipboard
clipcopy <file>         # copies the content of a file to clipboard
If this doesn’t work, you are probably missing xclip. Install it via
sudo apt-get install xclip
Somehow, I have a hard time remembering the name clipcopy, therefore I set a global alias as described above:
alias -g ctrlc=' | clipcopy'
echo "copythisinclipboard" ctrlc
If you don’t use Oh my Zsh, you can get the functionality of clipcopy via an actual plugin.
SSH Setup
One of the great advantages of using Linux instead of Windows is the out-of-the-box SSH support. Immediately after installing your distribution, you can start to access remote servers.
However, there is some room for streamlining your SSH tasks. You can avoid lots of repetitive typing if you modify your .ssh/config file and setup meaningful defaults for the machines you access regularly:
Host ec2-instance # you can freely chose a name here that will act as alias for this host
    HostName <ip-address or hostname>
    User tkainrad


Host cluster # you can freely chose a name here that will act as alias for this host
    HostName <ip-address or hostname>
    User tkainrad
    IdentityFile `/home/tkainrad/cluster_rsa.pub`
For more sophisticated settings, look up the ssh_config man page.
If you want to go one step further, you can set up public key authentication so you can login to your most-used remote hosts without having to re-enter your password each time.
With ssh-copy-id, there is a simple tool that streamlines this process. If you have your hosts already configured via the .ssh/config file, just do
ssh-copy-id ec2-instance
By default, ssh-copy-id will take your public key in ~.ssh/id_rsa.pub. If you want to use different keys for each of your remote hosts, check out the man page page or this more extensive guide. If you use keys other than ~.ssh/id_rsa.pub you also have to add an IdentityFile entry to your .ssh/config settings. Afterwards, you will be able to access the machine by simply doing:
ssh ec2-instance
Additional Tools
A great terminal gets you a long way. However, some additional tools can help make your workstation more complete. In this section, I try to present some of my favorites that could be useful to almost anyone.
Text Editing: VSCode
For most of my more extensive software engineering projects, I use JetBrains products or Eclipse. I will not describe setting up those in this post, as this would easily mandate a separate article. However, I present a more lightweight editing environment that is often a better choice than to start up a full-blown IDE. For a software engineer, especially for one that deals also with DevOps workloads, it is the daily business to edit and view all kinds of text-based files, such as .txt, .csv, .md, xml, .yml, and .json. For this, it is essential to have a fast text editor which can deal with large files and still provides sophisticated editing features.
Previously, I used Sublime. For a couple of months now, I have switched to Visual Studio Code and I am still amazed by it. Comparing it to Sublime makes little sense in my opinion, because VSCode is just on a whole other level. Even for software projects with relatively simple technology stacks, such as this blog website, I now prefer VSCode over Eclipse or the JetBrains suite.
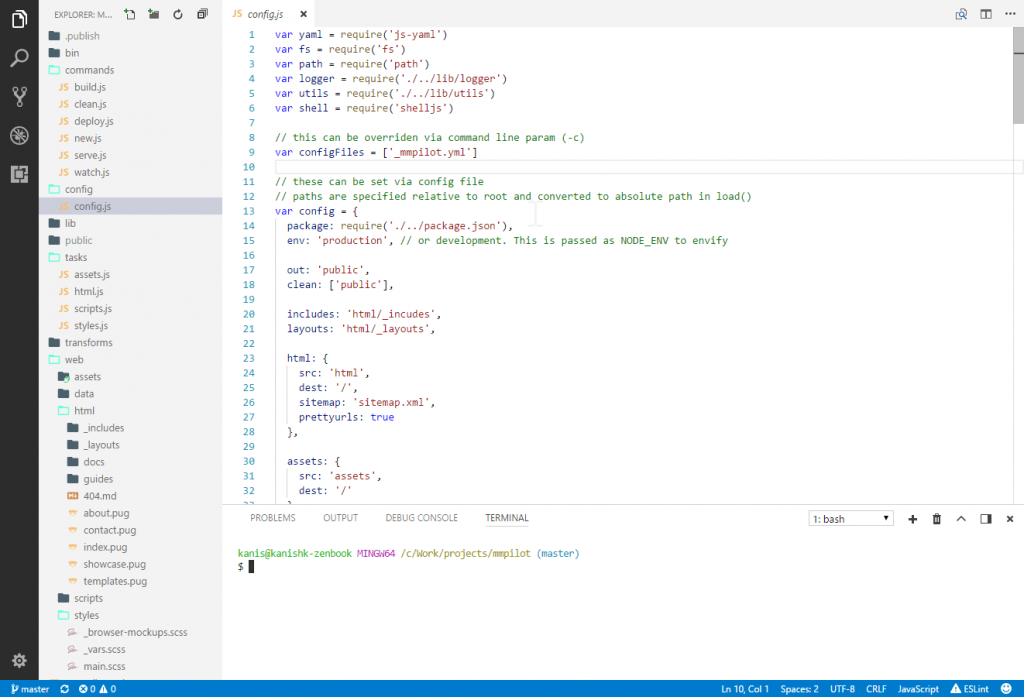
Screenshot of VSCode showing the default light theme (Light+) (Source).
The easiest way to install Visual Studio Code on Ubuntu is to visit the official website and to download the Debian package. You could have probably figured out how to do this yourself, but do you also know how to set VSCode as the default application for all text files? Simply do
xdg-mime default code.desktop text/plain
This will spare you the headache of doing Right-Click -> Properties -> Open With -> Set as default on every file type separately.
Switching to VSCode from Sublime (or any other editor) is a surprisingly pleasant experience. VSCode will recommend the most relevant plugins as you go. For example, if you open a .py file, some extensions for Python development will be recommended. Installing them is then just a click away and doesn’t even require a restart of the application. After some days of following VSCode’s recommendations and occasionally searching for some extensions manually, my setup was more complete and efficient than it ever was with Sublime.
VSCode Terminal with Agnoster
If you don’t intend to use the integrated VSCode terminal, you can safely skip this section.
If you followed this guide until here and you now open an integrated Terminal in VSCode, you will likely be a bit disappointed. There are several problems. With our current setup, we need a monospace font, and the coloring does not work nicely with VSCode’s light theme.
Fortunately, we can fix these things:
First, install the Menlo for Powerline font:
git clone https://github.com/abertsch/Menlo-for-Powerline.git
sudo mv "Menlo for Powerline.ttf" /usr/share/fonts/
sudo fc-cache -vf /usr/share/fonts/ # Refresh fonts cache
Then, we change our terminal prompt colors a little bit to be compatible with both light and dark themes. Open ~/.oh-my-zsh/themes/agnoster.zsh-theme and change prompt_context to the following:
# Context: user@hostname (who am I and where am I)
prompt_context() {
  if [[ "$USER" != "$DEFAULT_USER" || -n "$SSH_CLIENT" ]]; then
    prompt_segment cyan default "%(!.%{%F{yellow}%}.)%n@%m"
  fi
}
Finally, we apply the new font and the new colors in the VSCode settings. Press Ctrl+Shift+P and start to type Preferences: Open Settings (JSON). We can now add the following lines to settings.json:
    "terminal.integrated.fontFamily": "Menlo for Powerline",
    "workbench.colorCustomizations": {
        "terminal.ansiBlue": "#01A0E4",
        "terminal.ansiCyan": "#B5E4F4",
    },
The integrated VSCode terminal now looks nice and has all the functionality of all of our Zsh plugins.

Sync Configuration Files: Mackup
So you just set up your desktop workstation, modified a bunch of configuration files, manually adjusted your VSCode keyboard shortcuts and now you want to do this also with your notebook?
The solution to this is one of my favorite tools of all: Mackup
It will use any software that can sync a folder, such as Dropbox, to keep your application settings in sync.
You can install it with pip:
pip install --upgrade mackup
If you have versioning troubles with pip or Python on Ubuntu 20.04, I recommend to do sudo apt install python-is-python3. It will symlink /usr/bin/python to python3 and hence make your transition to a world without Python 2 easier.
Once Mackup is installed, you can copy your application settings to Dropbox (per default) doing
mackup backup
To apply them at a different machine, just use
mackup restore
Behind the scenes, Mackup copies your configuration files to your Dropbox and then replaces the originals with symbolic links. Have a look at the GitHub Readme for more details.
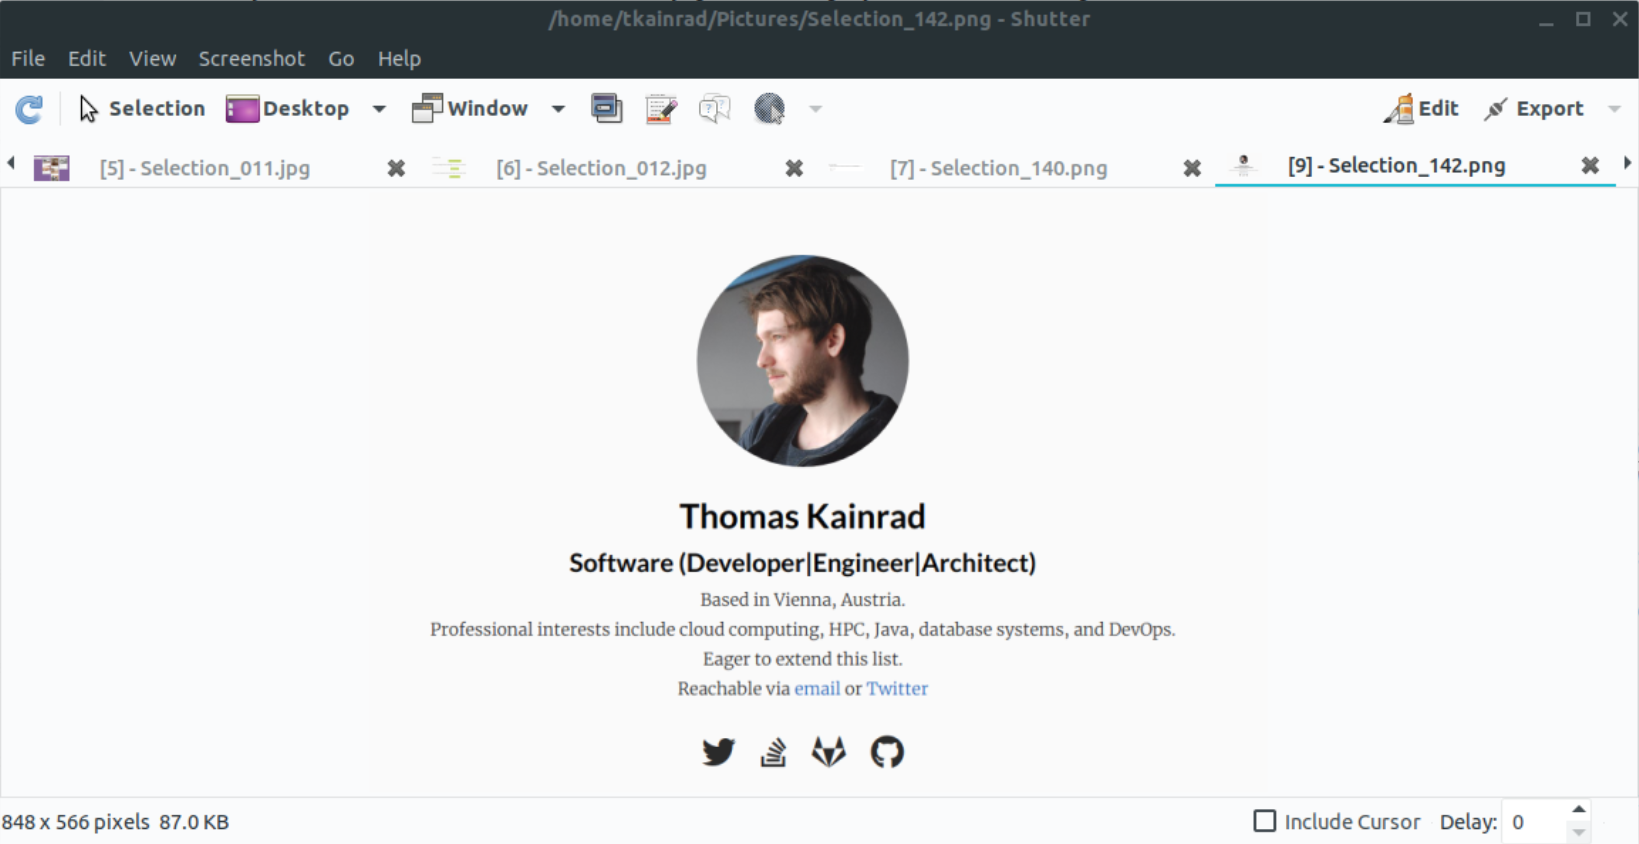
Advanced Screenshots: Shutter
If you are coming from Windows, you probably use the Snipping Tool on a regular basis. With Screenshot, Ubuntu has a similar tool installed by default. However, there is another option that is superior to both the Windows Snipping Tool and the Ubuntu default: Shutter
Unfortunately, it is no longer included in the default package repositories since Ubuntu 18.10. So, we have to add a third-party PPA first:
sudo add-apt-repository ppa:linuxuprising/shutter
sudo apt-get install shutter
It is very simple to use and does not force you to become familiar with its advanced features. There are a few alternatives that are still actively developed, such as Flameshot. Unfortunately, those are missing a lot of Shutter’s more advanced features. So, I will stick with Shutter for as long as I can make it run on Ubuntu.
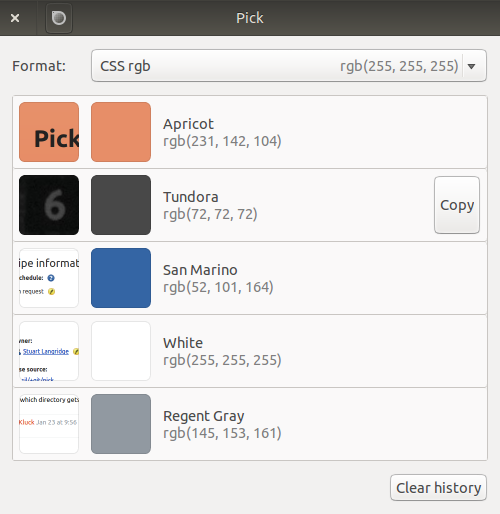
Pick Colors: Pick
If you do front-end development, chances are you need a color picking tool on your computer. The most commonly used tool on Ubuntu is GPick. However, it drives me crazy. Usually, I just want to pick a color and get the hex code into my clipboard. GPick makes this very hard. So instead, I recommend Pick, a simple and functional alternative.
Cheatsheet: KeyCombiner Desktop
Most people know KeyCombiner as a tool for browsing and learning shortcuts. However, its desktop app serves an additioanl purpose with its instant lookup feature: It is a context-aware cheatsheet that can show the shortcuts of the currently active application in addition to whatever key combinations and text snippets I have in my personal KeyCombiner collections.
To trigger it, I only have to press Super+Alt+C. The main advantage is that I don’t have to leave the current context and can resume work right after looking up the required piece of information:
KeyCombiner’s instant shortcut lookup for VSCode, Terminal, and Chrome.
Communication Hub: Ferdi
Did you ever see someone using their phone while sitting in front of their personal computer? Chances are, they were using a communication app that they could have used much more efficiently from their larger device with an actual keyboard. To get the benefit of receiving all notifications from all my communication tools, and to be able to respond easily, I use Ferdi. It is particularly useful if you have to monitor several Slack teams.
In contrast to most of its competitors (Rambox, Wavebox, Franz 5), Ferdi is completely free and open-source.
If you want Ferdi or any other software that is distributed via an AppImage to show up properly in the dock, have a look at appimaged. It is open-source software that monitors specific directories for AppImage files and installs them properly in the system.
Previous versions of this article recommended Station instead of Ferdi. However, Station pivoted to become a browser extension and is no longer an option for bundling communication channels outside of your regular browser.
Record Short Screencasts: Peek
Did you wonder how I created those fancy gifs showing my terminal? I thought so.
Peek is a very lightweight and simple tool to record short screencasts. To install it on Ubuntu do
sudo add-apt-repository ppa:peek-developers/stable
sudo apt update
sudo apt install peek
Peek in action. (Source).
During the creation of this article, I was made aware by a good friend and fellow software engineer of dedicated terminal recording tools, such as Terminalizer and asciinema. However, these require some initial setup work, especially if you want to show off a theme and require that your animated terminal looks exactly like your actual terminal.
Since I already recorded most of the animations, I decided to stay with Peek for this post. Nevertheless, if your use case is terminal recording, you should probably go with one of the linked projects instead of Peek.
Mail Client: Thunderbird
For mail, I use Thunderbird. I don’t particularly like it, but to my knowledge it is still the best desktop email client for Linux. Unfortunately, some minor design decisions make the program almost unusable for me in its default state. The reason I include this section about software that everyone knows already is mainly to highlight three changes I always make to the default setup:
- By default, Thunderbird sorts messages by date ascending. I think that’s an unfortunate default. Who wants to scroll down constantly to see the newest messages? To change the sort order to descending (newest first), go to Preferences -> General -> Config Editor and set mailnews.default_sort_order to value 2. See this StackExchange answer for more details about default sorting orders and other options.
- Install the No Message Pane Sort by Mouse add-on. With this extension, a click on the mail list table header will no longer change the defined sort order. Without it, misclicks while trying to select the first mail in the list are very annoying. Personally, I never want to change the sort order at all. However, it is still possible by holding Ctrl while clicking.
- Finally, go to Preferences -> Composition and uncheck the Use Paragraph format instead of Body Text by default to prevent Thunderbird from adding absurd amounts of whitespace whenever you press the Enter key while composing a mail.
Are you already using Thunderbird on another computer? Fortunately, there is an easy way to migrate all your mail accounts and settings. Essentially, you can copy a hidden folder where Thunderbird stores all its data and move it to the new machine, as described in Mozilla’s official documentation.
If you know of a new fancy alternative to Thunderbird that handles parallel usage of several mail accounts well, please let me know.
Bonus Tip
If you have read this far, I am willing to share my most secret Linux hack with you. Joking aside, it is very helpful to know what to do when your Linux workstation freezes. For some reason, I did not know until a couple years ago. Maybe the following trick can help you to avoid some forced restarts in the future.
The most flexible way to re-gain control of a system that has frozen completely is pressing Ctrl+Alt+F3. Then, use top and other process monitoring tools to find the process IDs of the faulty processes. Then, simply kill them (e.g. type kill <pid>, killall, or kill -9). Afterward, you can get back to your work using Ctrl+Alt+F1. (Source).
Conclusion
I hope this post showed you some tools or practices that you didn’t know yet. I have had a good experience with all of them. Especially switching from Bash to Zsh and installing the described plugins came with a real productivity boost. If you feel that I left out something important, I’d be very interested to hear your suggestions.
If you are not mainly using Linux yet, the length of this post might give the impression that it is still a pain to set up a proper Linux workstation. However, you do not necessarily need all of the things I showed here. Also, everything covered in this post is very easy to install with minimal configuration overhead. I strongly believe that you would have a much harder time setting up a comparable Windows development workstation.
You can still spend your life setting up Linux. However, if you use a popular, well-supported distribution you definitely don’t have to. (Source: xkcd.com)